VISUAL ART
PERSONAL COAT OF ARMS
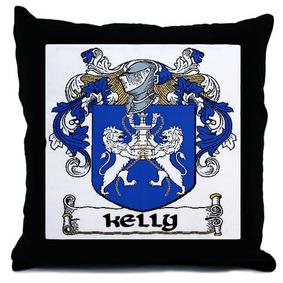
Coat of Arms History
Traditional family crests stemmed from heraldic arms, also known as coat of arms or armorial bearings. Heraldic arms were common throughout Europe in the Middle Ages (the 1000 years between the 5th and the 16th century).
Historically heraldic arms were a design belonging to a particular person or group of people. These designs tended to be used by knights and noble men to identify them apart from enemy soldiers. In such traditions these coat of arms were passed from father to son or from wife to daughter.
Over time the use of such crests moved from the military to families, regions and other institutions such as educational institutions.
In times past your own family ancestors would have approached a heraldic artist or officer of arms to design your family crest. Your ancestors would have chosen attributes of that family that the officer of arms would depict in the family crest. These attributes would tend have been depicted through various shield designs, colour(s) and symbols, known as ‘charges’, such as animals and plant designs.
Assignment
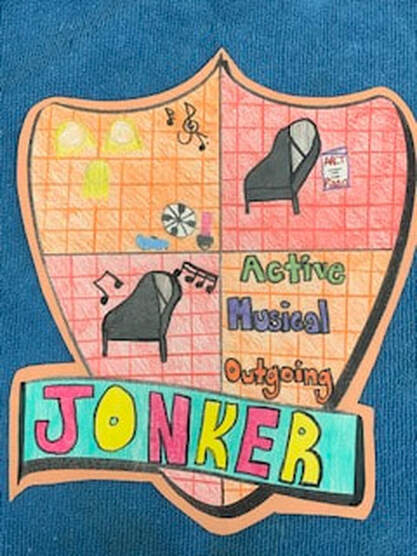
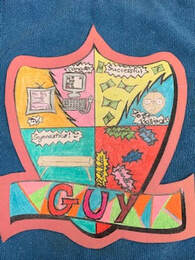
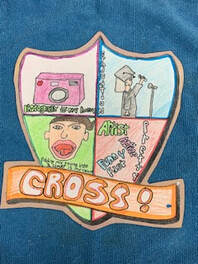
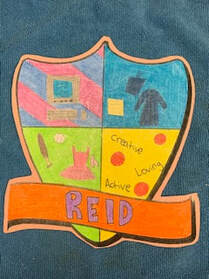
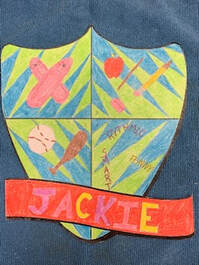
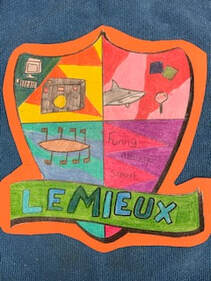
Your task is to create a personal coat of arms that depicts aspects of who you are.
Your coat of arms should include the following design elements:
1. Your family name in block or bubble letters in the ribbon on the bottom of the plaque.
2. Each quadrant should display a different aspect of your life:
Quadrant #1- What do I like to do in my spare/leisure time?
(Examples include: reading, writing, playing video games, shopping etc.)
Quadrant #2 - What is a special gift/talent you possess?
(Examples include: playing an instrument, singing, painting, juggling, athletic endeavours etc.)
Quadrant #3 - What is a goal I have for my future?
(Examples include: completing high school, attending university/college, getting married, playing in the NHL, writing a novel, joining a rock band, etc.)
Quadrant #4 - What are three words that people would use to describe my personality? (Examples include: generous, kind, loyal, determined, motivated, spiritual, faithful, easy-going, fun-loving, humorous, etc.)
3. The entire plaque should be neatly coloured (limited amount of white space).
Due Date: Friday, September 10th
***In case you have misplaced your coat of arms there is a link to the original template below. As well, there are completed examples included in order for students to get a sense of what the finished product should look like.
Coat of Arms History
Traditional family crests stemmed from heraldic arms, also known as coat of arms or armorial bearings. Heraldic arms were common throughout Europe in the Middle Ages (the 1000 years between the 5th and the 16th century).
Historically heraldic arms were a design belonging to a particular person or group of people. These designs tended to be used by knights and noble men to identify them apart from enemy soldiers. In such traditions these coat of arms were passed from father to son or from wife to daughter.
Over time the use of such crests moved from the military to families, regions and other institutions such as educational institutions.
In times past your own family ancestors would have approached a heraldic artist or officer of arms to design your family crest. Your ancestors would have chosen attributes of that family that the officer of arms would depict in the family crest. These attributes would tend have been depicted through various shield designs, colour(s) and symbols, known as ‘charges’, such as animals and plant designs.
Assignment
Your task is to create a personal coat of arms that depicts aspects of who you are.
Your coat of arms should include the following design elements:
1. Your family name in block or bubble letters in the ribbon on the bottom of the plaque.
2. Each quadrant should display a different aspect of your life:
Quadrant #1- What do I like to do in my spare/leisure time?
(Examples include: reading, writing, playing video games, shopping etc.)
Quadrant #2 - What is a special gift/talent you possess?
(Examples include: playing an instrument, singing, painting, juggling, athletic endeavours etc.)
Quadrant #3 - What is a goal I have for my future?
(Examples include: completing high school, attending university/college, getting married, playing in the NHL, writing a novel, joining a rock band, etc.)
Quadrant #4 - What are three words that people would use to describe my personality? (Examples include: generous, kind, loyal, determined, motivated, spiritual, faithful, easy-going, fun-loving, humorous, etc.)
3. The entire plaque should be neatly coloured (limited amount of white space).
Due Date: Friday, September 10th
***In case you have misplaced your coat of arms there is a link to the original template below. As well, there are completed examples included in order for students to get a sense of what the finished product should look like.
| coatofarms.docx |
If your interested in this topic, follow this link to discover what the symbols mean in our Canadian Coat of Arms:
http://bit.ly/T6e1c3
http://bit.ly/T6e1c3

|
|
|
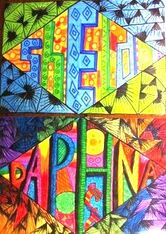
CREATING A PERSONALIZED ART FOLDER
(This project may be skipped unless a large number of art pieces are projected to be completed)

An art folder serves several purposes within an art class:
(1) it may be an art project on it's own,
(2) it is a receptacle for storing other art work, and
(3)at the end of the school year, it may serve as a portfolio for one's best work.
Form and function are both important in the creation of a functional art project. Form gives shape to creativity and intelligence supports the orderly function of the piece.
Assignment
Your task is to create your own art folder. You must include the following design elements:
The students will receive two art periods to work on the folder.
(1) it may be an art project on it's own,
(2) it is a receptacle for storing other art work, and
(3)at the end of the school year, it may serve as a portfolio for one's best work.
Form and function are both important in the creation of a functional art project. Form gives shape to creativity and intelligence supports the orderly function of the piece.
Assignment
Your task is to create your own art folder. You must include the following design elements:
- Your name must appear prominently on the folder.
- The words "Art Folder" must appear on the folder.
- The homeform number 8-2 must appear on the folder.
- Empty space should be filled with decorative pieces that brighten and exentuate the appearance.
The students will receive two art periods to work on the folder.
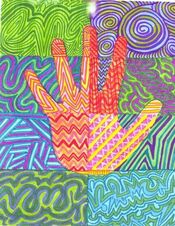
DOODLE LEAVES
Doodling as an Art Form
"Doodling is generally seen as something everyone can do and therefore not really "art". The internet and scrapbooking have caused doodling to come into its own as a legitimate art form.
But what is doodling? How is it different from sketching? I would say that doodling is when you draw without any clear purpose or outcome. Mainly you just let your hand move and follow it's fancy. Or you may try to draw something but you aren't too worried about realism."
Quote from Intuitive http://www.squidoo.com/doodle-art
Doodles In Motion
Amazing YouTube video of wall sized doodle being created by several people and then recreated over and over again in different styles.
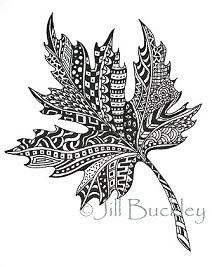
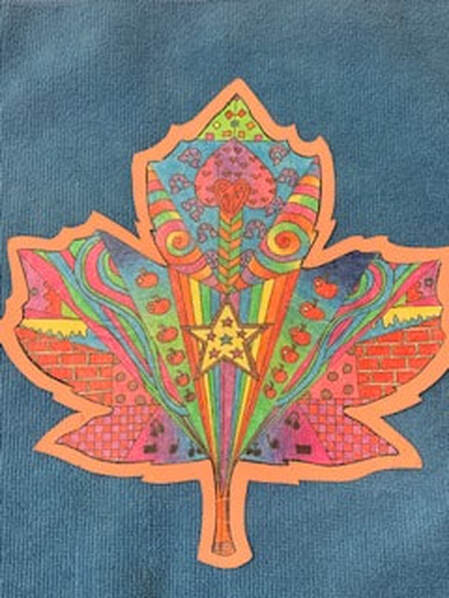
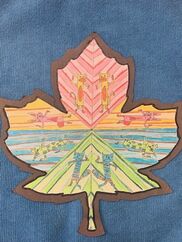
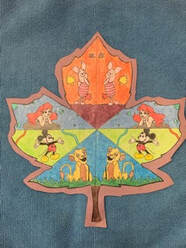
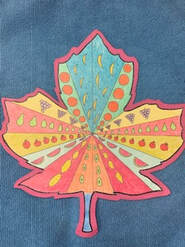
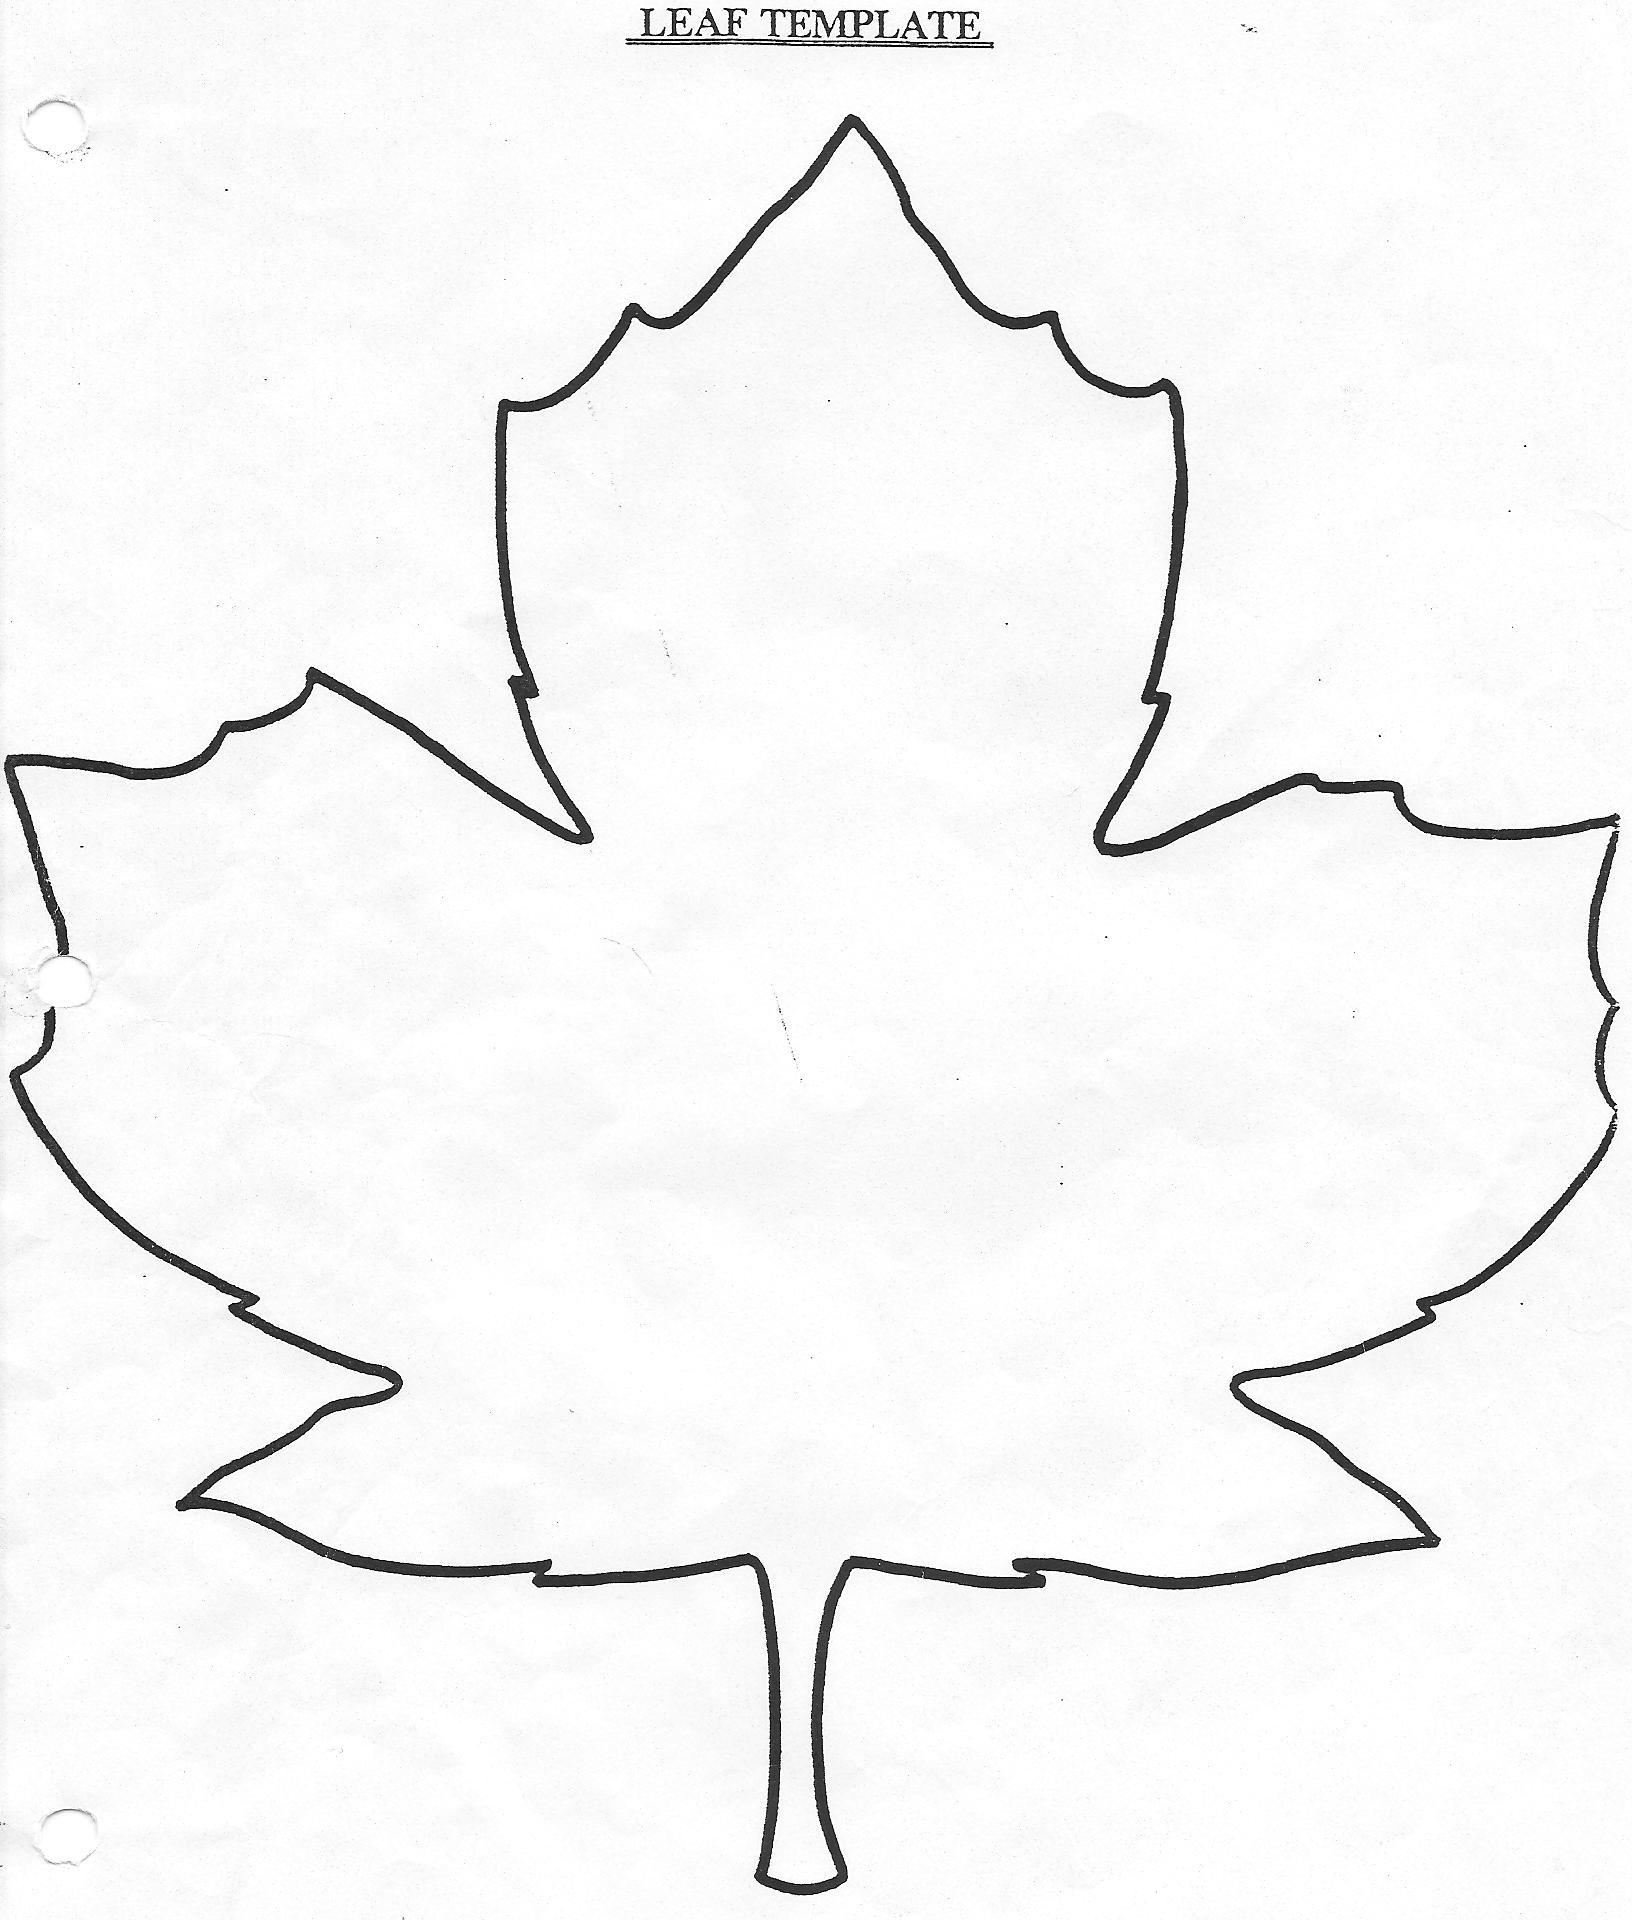
In this project the students will be able to recapture their inner pre-school child as they will be asked to "doodle" lines to create an intricate pattern on a leaf template.
1. We will start the class with a brainstorm of various lines that are used when doodling: criss cross, horizontal, swirl, zigzag, parallel, dotted, dashed, perpendicular, curved, straight, wavy, etc.
For an in-depth explanation of the interpretation of lines in doodles check out the following weblink: http://bit.ly/nMQKHE
2. We will also discuss the importance of varying thick and thin lines in helping to add some drama to the doodle.
3. We will then proceed to examine the art concepts of "Symmetry", "Line of Symmetry"; "Design", "Harmony" and "Rhythm" when creating balanced art pieces.
****Refer to the "Doodle Leaf Design Elements Lesson Plan" below for definitions and useful videos for this assignment. For an even more comprehensive definition of each of these art terms check out the following art glossary at http://bit.ly/emU2I5
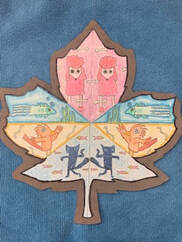
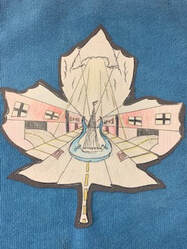
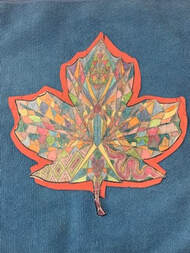
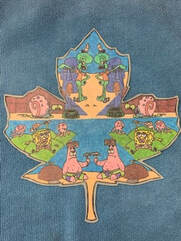
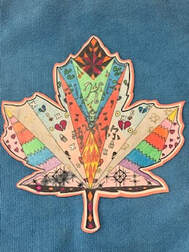
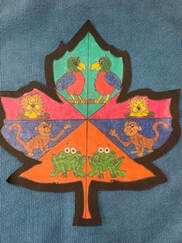
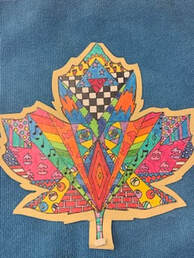
4. The leaf templates will be presented to the students and they will have the option of completing their doodle on either a maple or elm leaf template. Hint: In my experience, most students select the "Maple Leaf" template - must be a Canadian thing.
Assignment
The students task is to complete a Doodle Leaf incorporating as many of the design elements discussed in class as possible.
If a student happens to misplace a leaf template or decide to start over they may download and print off a new copy using the links provided below:
1. We will start the class with a brainstorm of various lines that are used when doodling: criss cross, horizontal, swirl, zigzag, parallel, dotted, dashed, perpendicular, curved, straight, wavy, etc.
For an in-depth explanation of the interpretation of lines in doodles check out the following weblink: http://bit.ly/nMQKHE
2. We will also discuss the importance of varying thick and thin lines in helping to add some drama to the doodle.
3. We will then proceed to examine the art concepts of "Symmetry", "Line of Symmetry"; "Design", "Harmony" and "Rhythm" when creating balanced art pieces.
****Refer to the "Doodle Leaf Design Elements Lesson Plan" below for definitions and useful videos for this assignment. For an even more comprehensive definition of each of these art terms check out the following art glossary at http://bit.ly/emU2I5
4. The leaf templates will be presented to the students and they will have the option of completing their doodle on either a maple or elm leaf template. Hint: In my experience, most students select the "Maple Leaf" template - must be a Canadian thing.
Assignment
The students task is to complete a Doodle Leaf incorporating as many of the design elements discussed in class as possible.
If a student happens to misplace a leaf template or decide to start over they may download and print off a new copy using the links provided below:
|
| ||||
|
| ||||
|
|
|
|

|

|
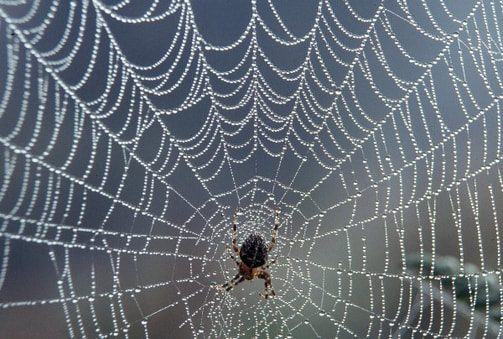
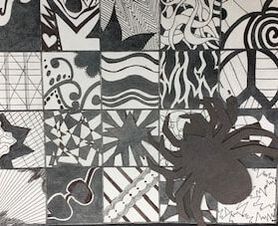
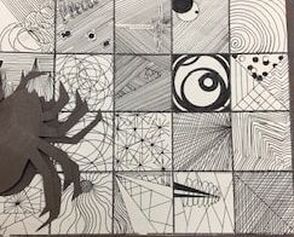
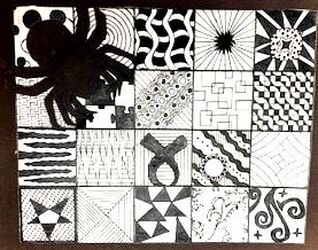
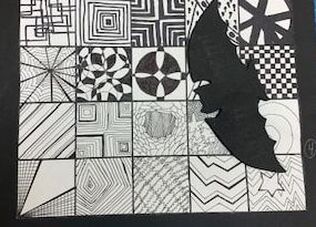
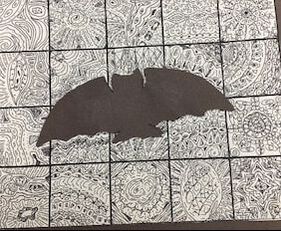
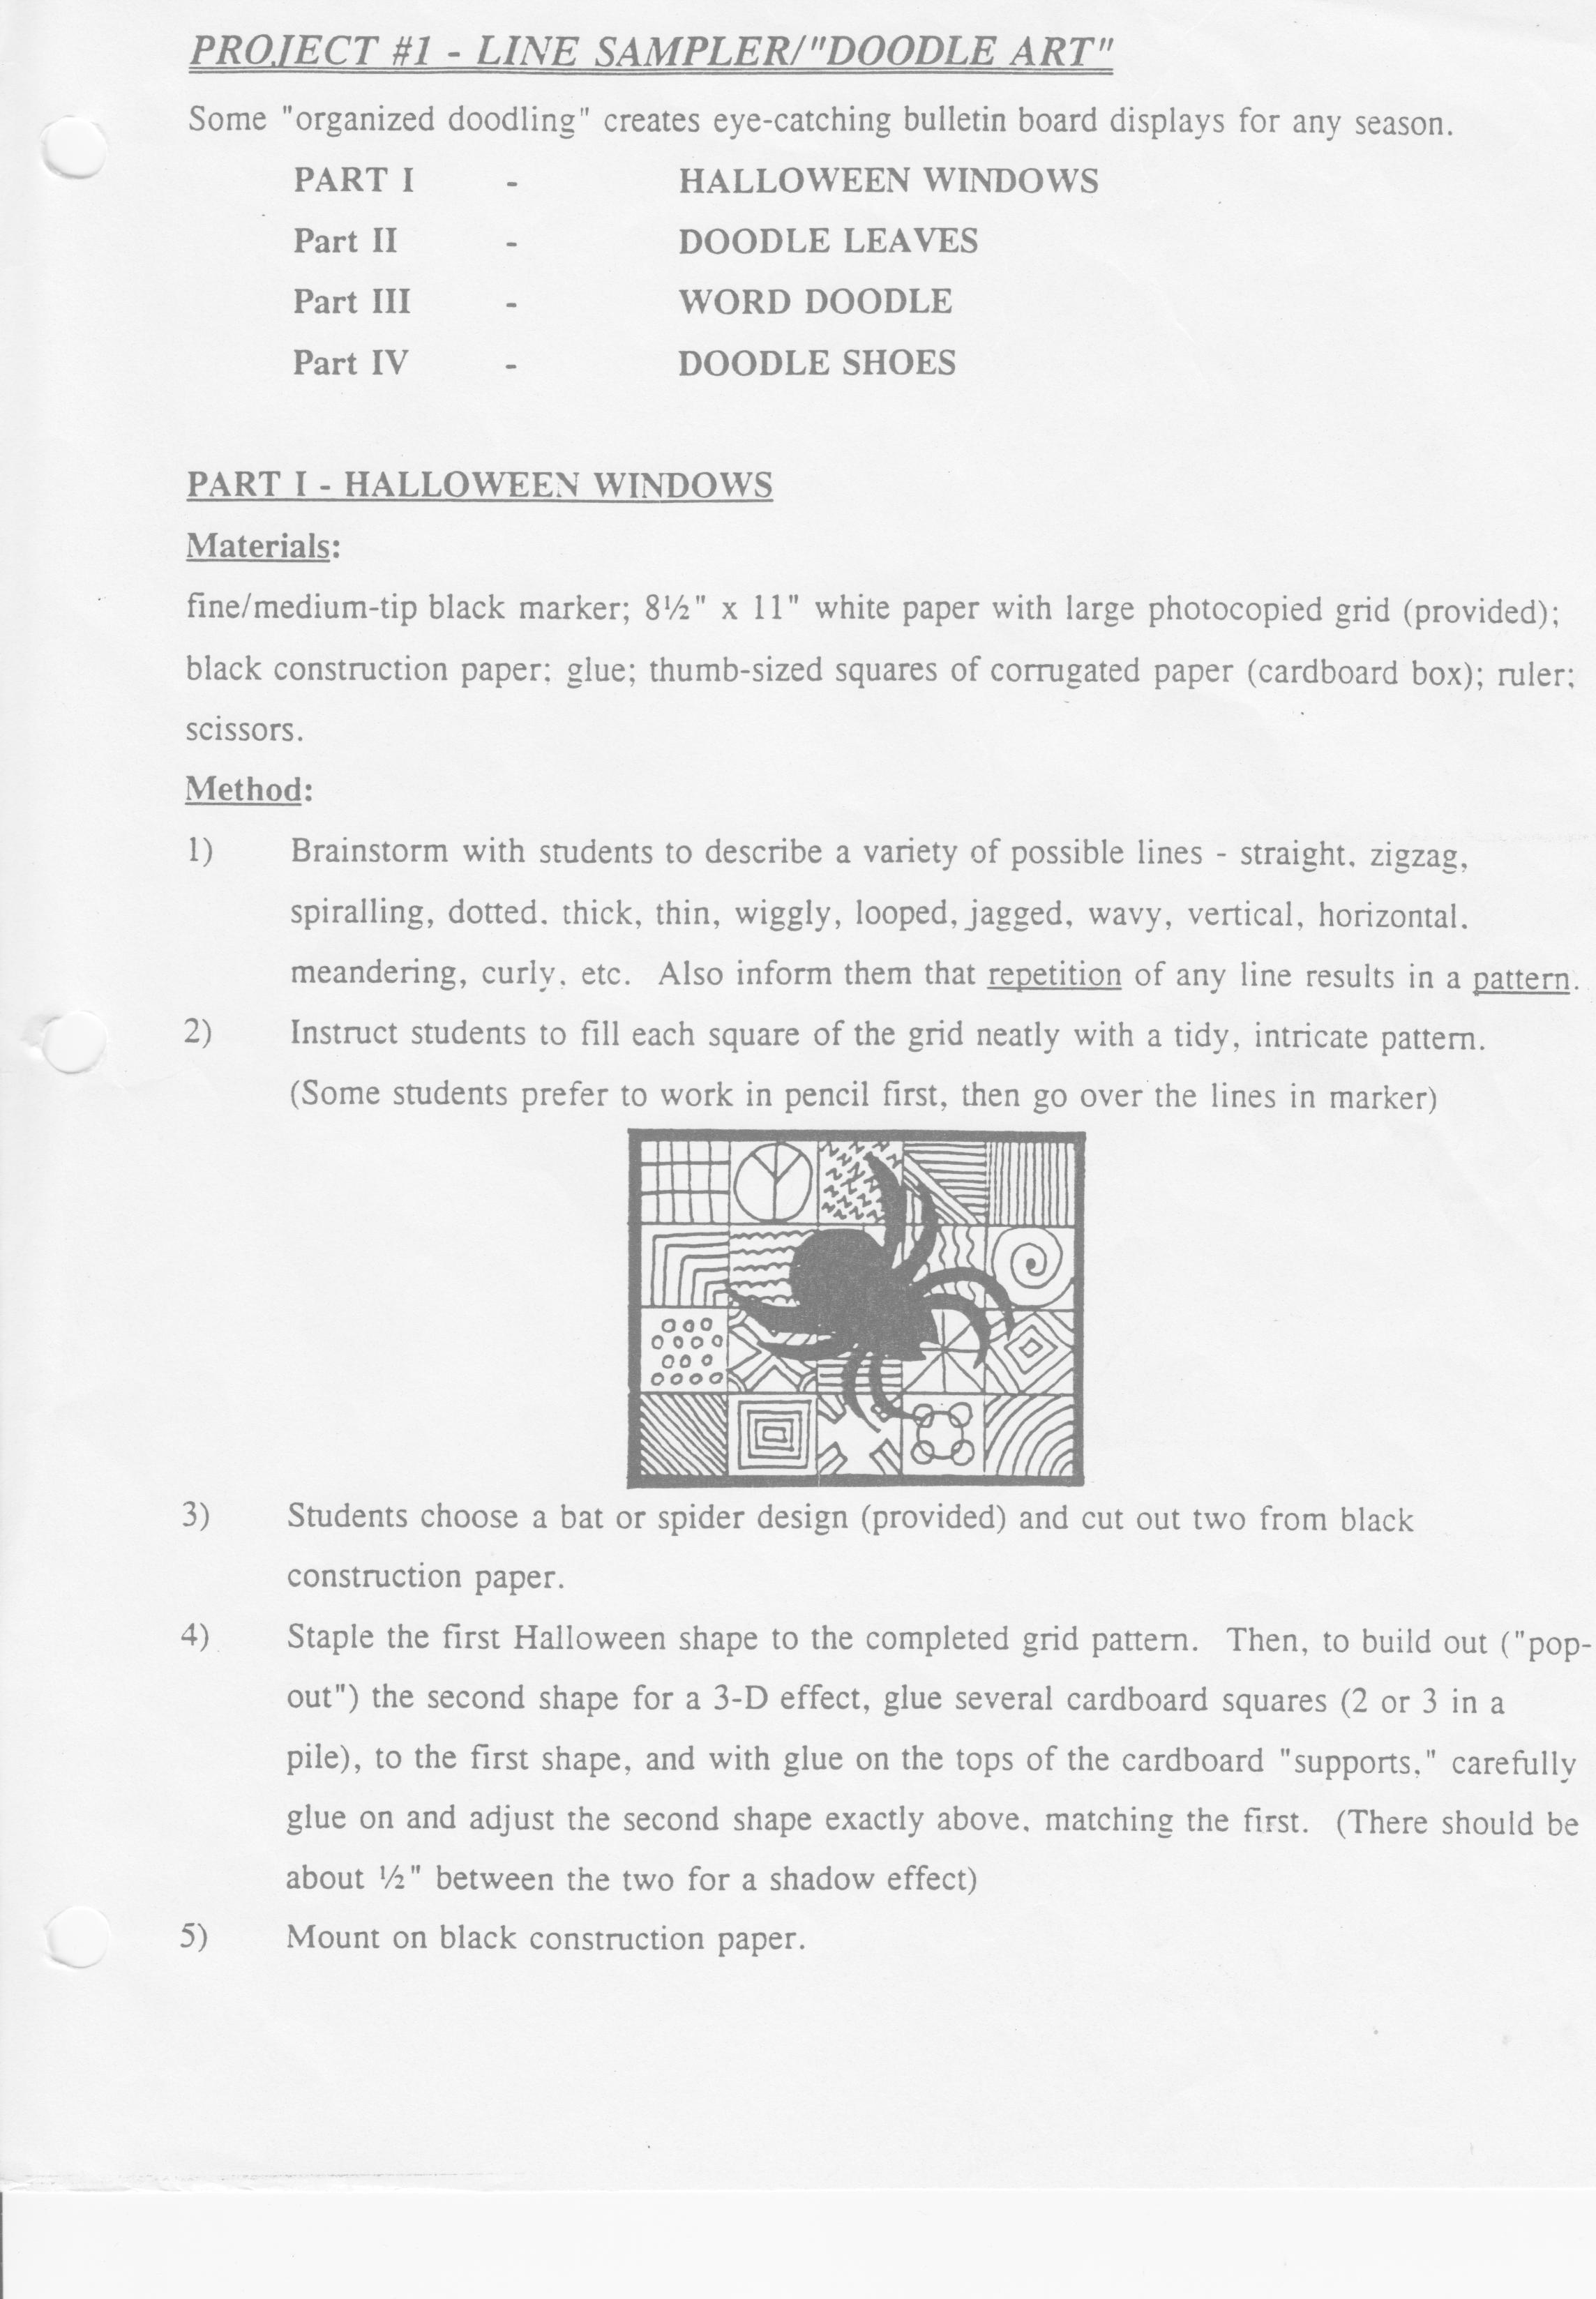
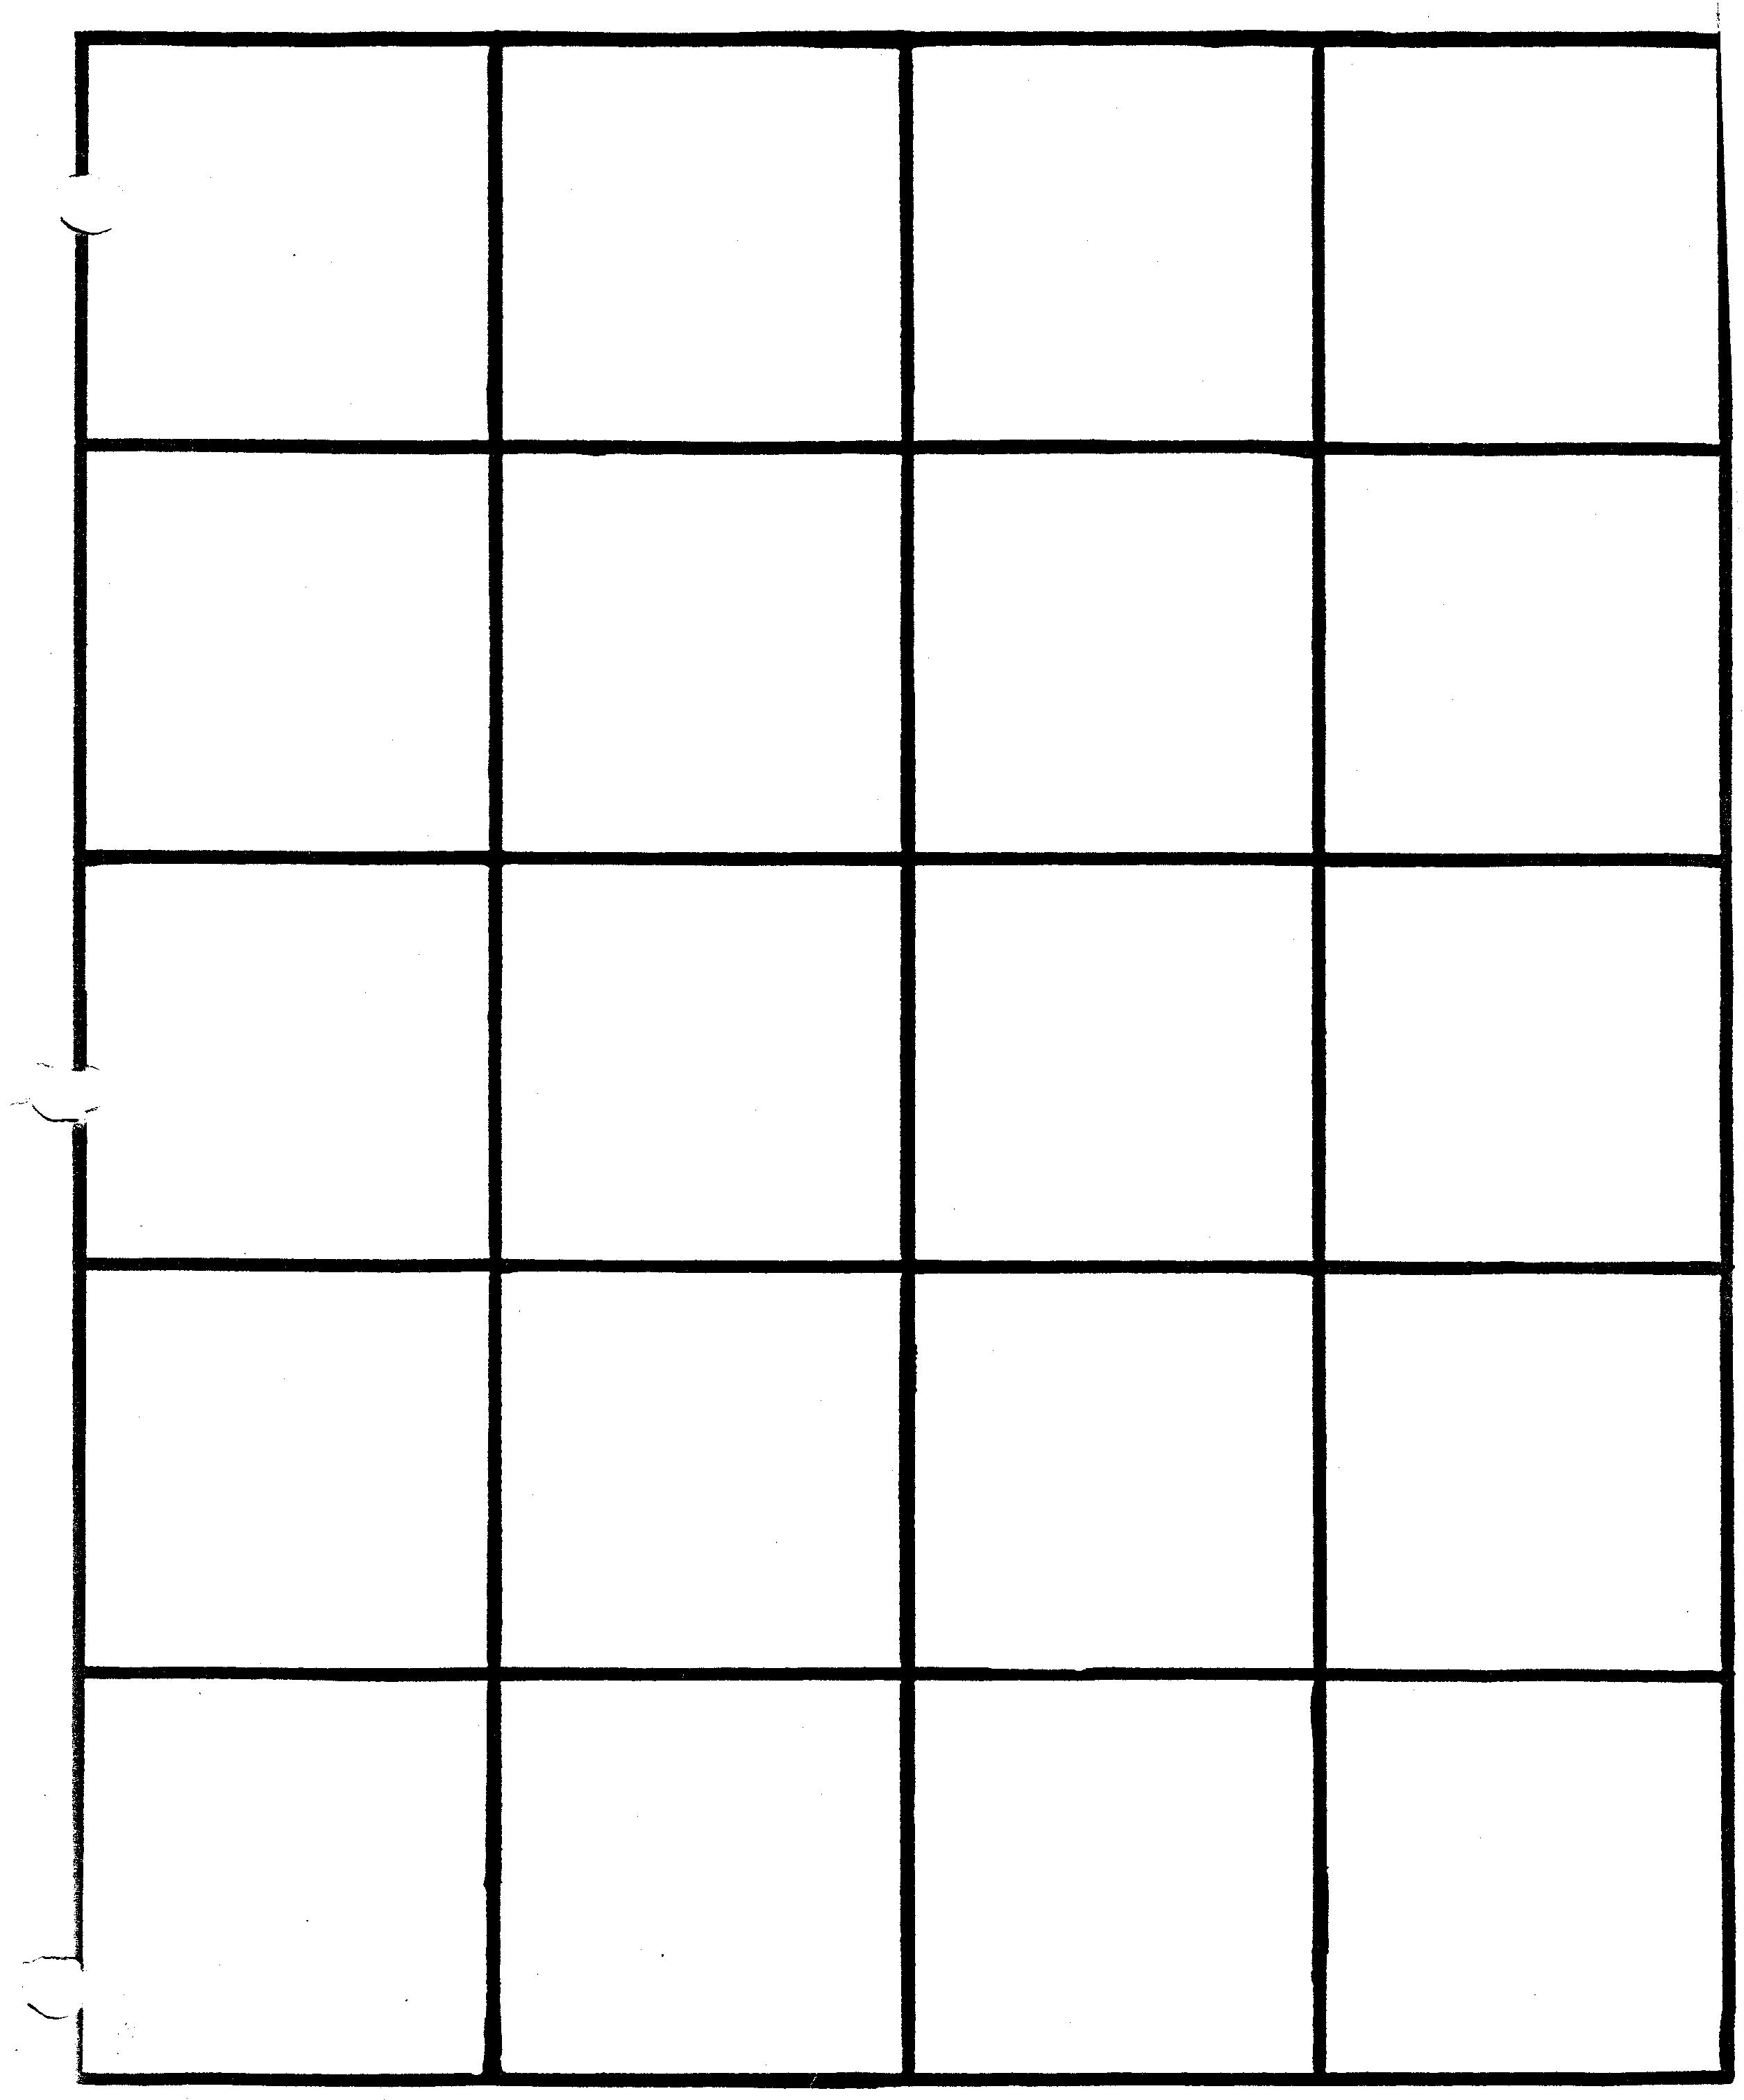
HALLOWE'EN WINDOWS
Following along the practice of "doodling" started in the previous project, the students now focus the patterns they create into a more organized series of lines following a theme in preparation for Hallowe'en.
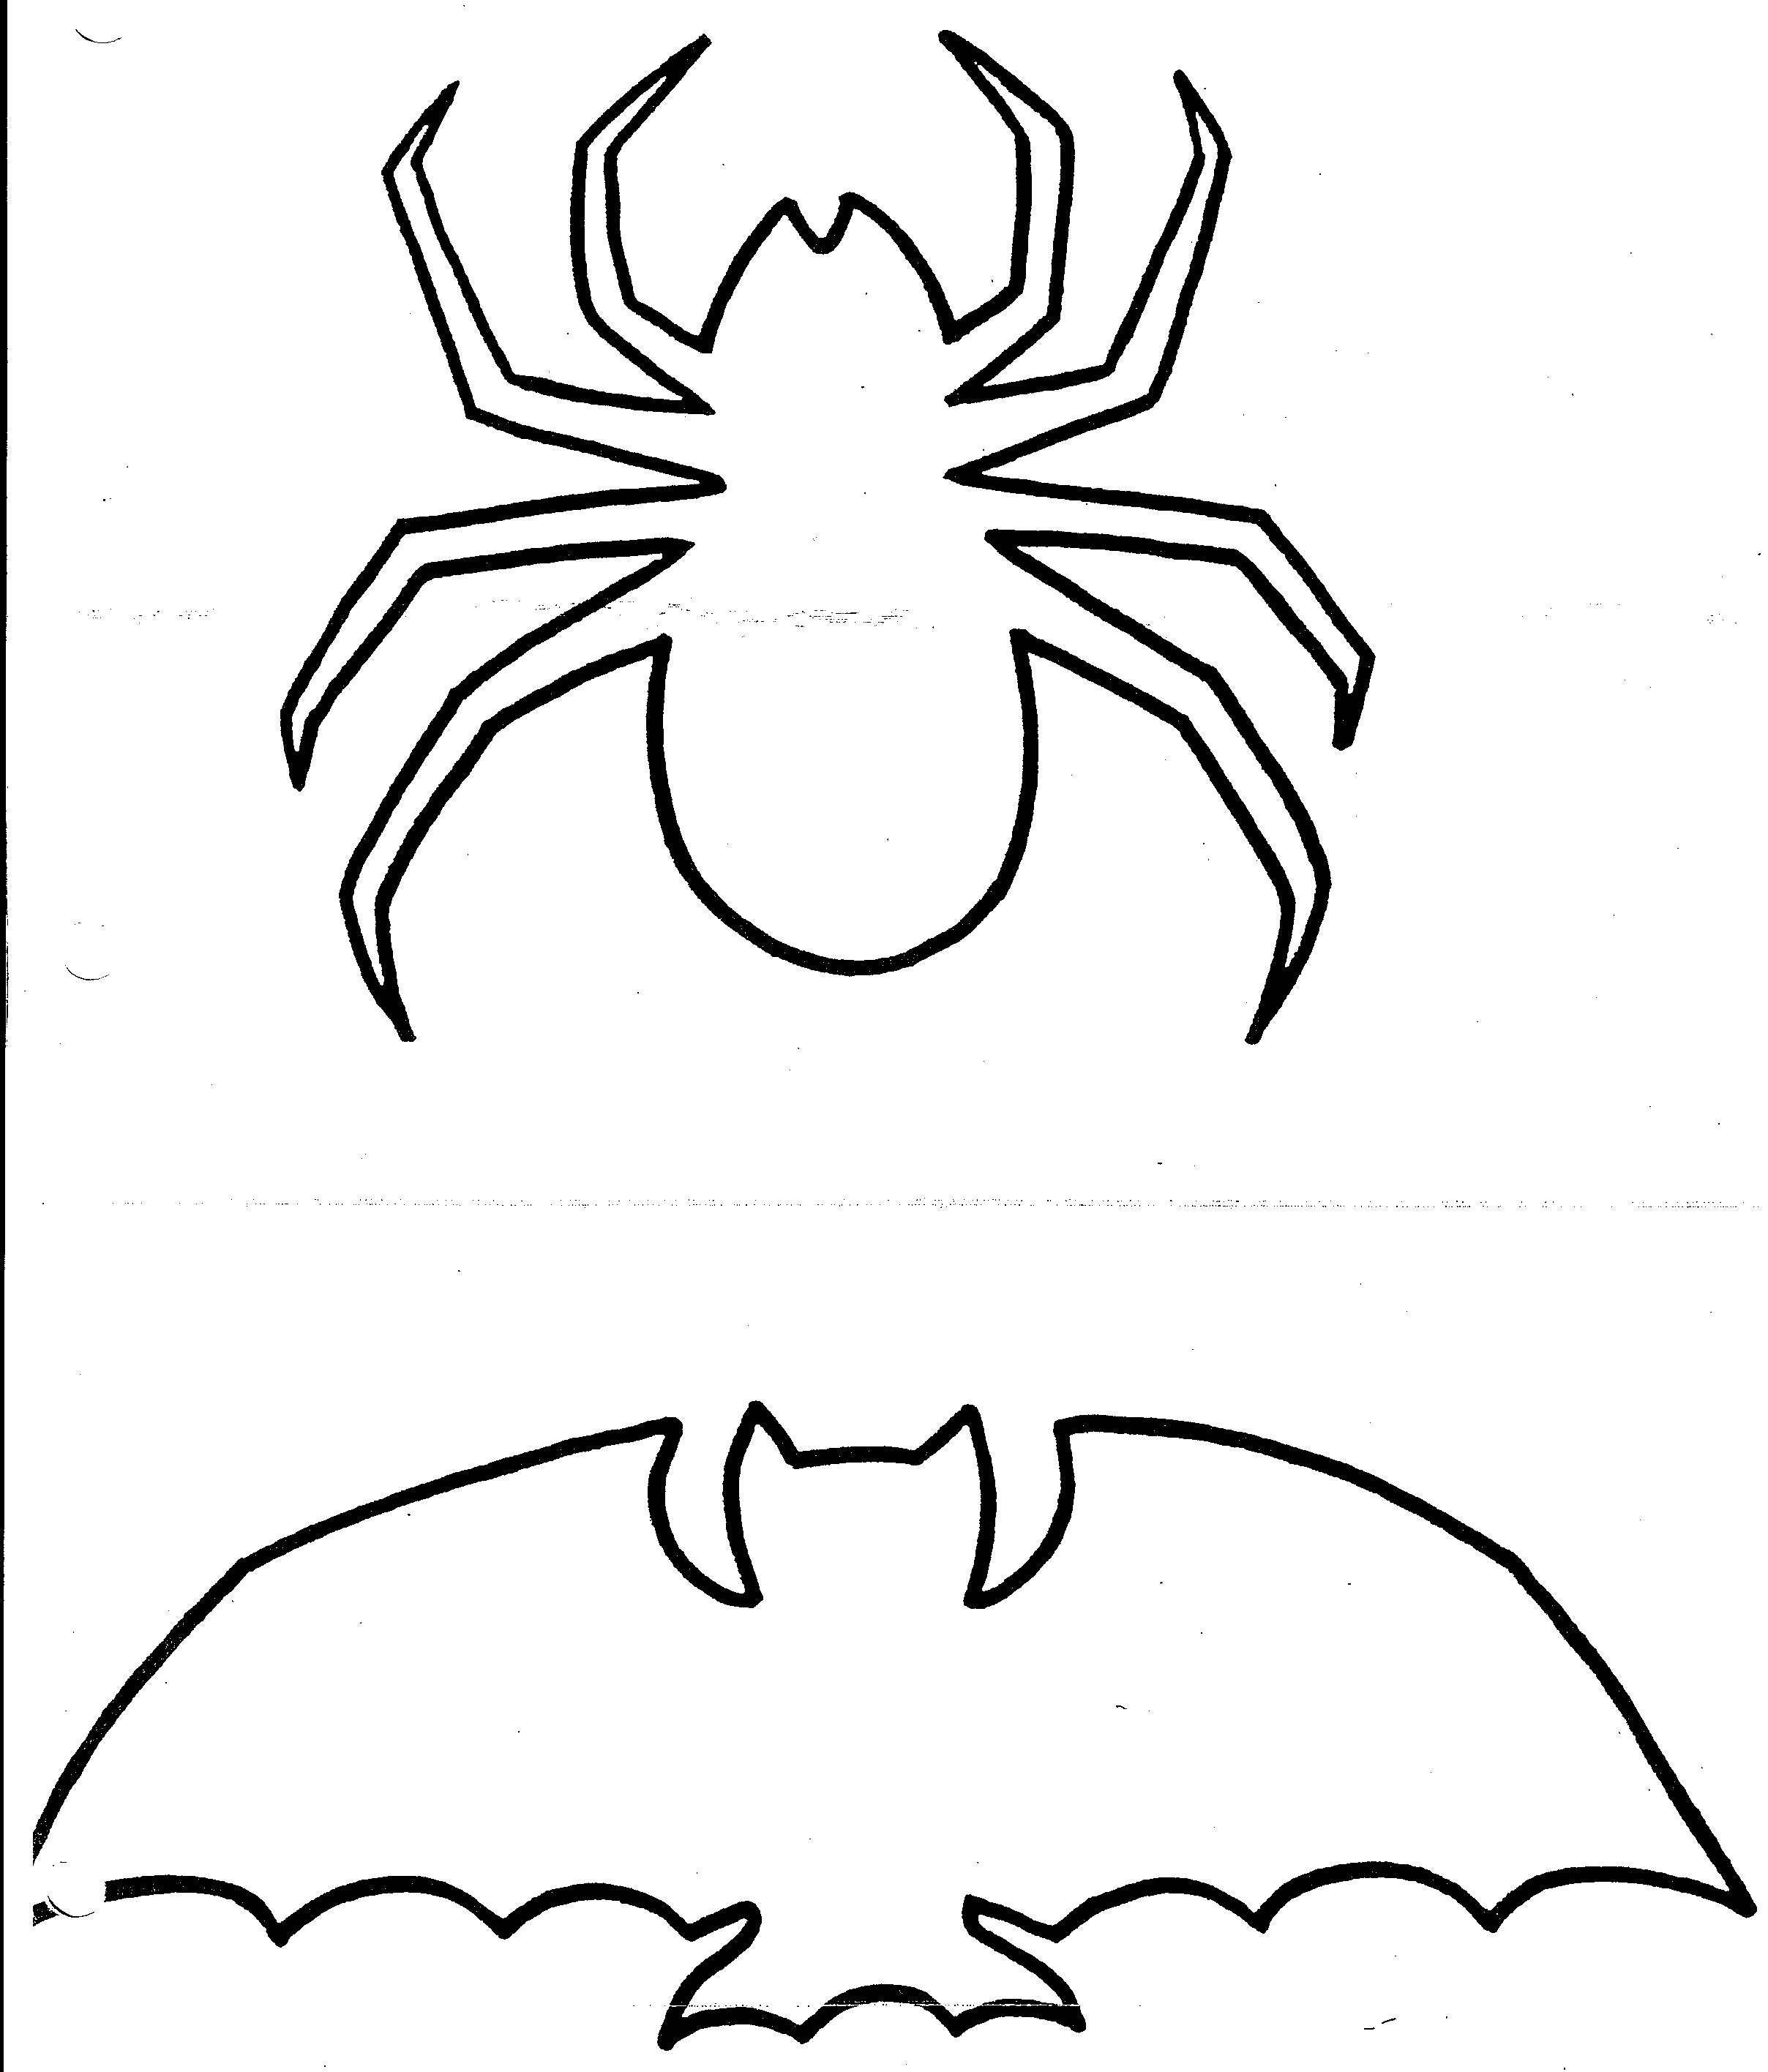
The following links provide the list of materials, the method and the templates to complete the project. I have also provided some examples of completed projects from the past.
|
| ||||
| spider_and_bat_template.jpg |
|
|
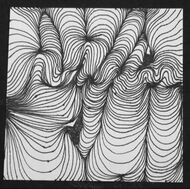
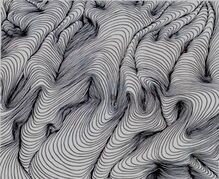
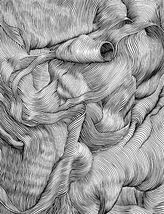
RHYTHMIC LINES/ CONTOUR ART
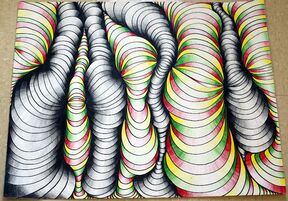
Example of Op Art
Contour means "outline", and presents exterior edges of objects.
A plain contour has a clean, connected line, no shading and emphasizes an open "shell" of the subject. More complex contours can imply shading values through interior outlines, and they may have line textures or be contrasted with mixed media. Pencil drawing, ball point pen and black markers are good practice tools.
The following websites have excellent descriptions of the principles of rhythmic lines and contour art and the elements (open line, balance, pattern, movement, colour) of this art project:
http://bit.ly/OJHqYF
http://bit.ly/rQPLvB
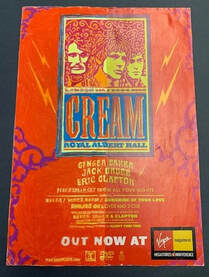
In the 1960's a new wave of art started that was inspired by the genius of Pablo Picasso and his work with contour lines (see picture above). This style emphasized illusion and eventually morphed into what is now called "Op Art" (for examples images google "op art" or see images below).
The following weblink provides an excellent description of the style of Op Art, some of the major artists who followed this style, it's influence on fashion and music: http://bit.ly/dEhfPd Definitely worth a look!
A plain contour has a clean, connected line, no shading and emphasizes an open "shell" of the subject. More complex contours can imply shading values through interior outlines, and they may have line textures or be contrasted with mixed media. Pencil drawing, ball point pen and black markers are good practice tools.
The following websites have excellent descriptions of the principles of rhythmic lines and contour art and the elements (open line, balance, pattern, movement, colour) of this art project:
http://bit.ly/OJHqYF
http://bit.ly/rQPLvB
In the 1960's a new wave of art started that was inspired by the genius of Pablo Picasso and his work with contour lines (see picture above). This style emphasized illusion and eventually morphed into what is now called "Op Art" (for examples images google "op art" or see images below).
The following weblink provides an excellent description of the style of Op Art, some of the major artists who followed this style, it's influence on fashion and music: http://bit.ly/dEhfPd Definitely worth a look!
- The first video below (Natural Hallucinogen) provides a neat lead in to the activity to have the image play a trick on the eyes/brains of the students. Note: if any of the kids are susceptible to seizures, you will need to bypass this video for the safety of that student(s).
- The other 3 videos provide varying techniques that may be employed by the students to get the "op art" effect. Have the students practice with all 3 before settling on the technique that provides them with the best result. I personally prefer the "worm tunnel" technique, but I have experienced success with all of the options.
|
|
|
Today the students were introduced to Op Art and the influence it had on pop culture from 1965-1975. We discussed the term "psychedelic" and how it relates to this art genre. After practising on a rough piece of paper using various doodle lines, the students were asked to complete an op art piece of their own.
| quilted_contour_line_art.pdf |
|
|
|
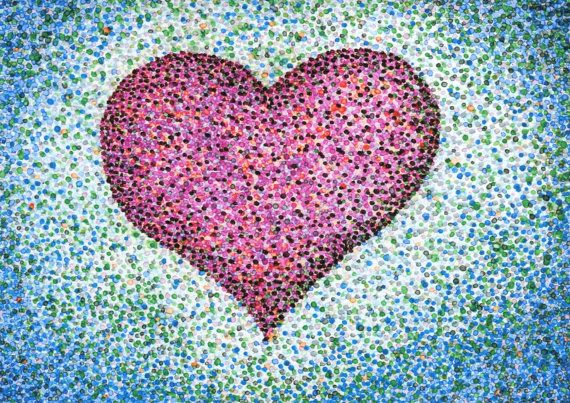
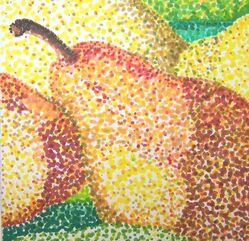
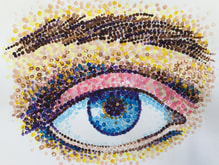
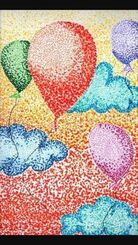
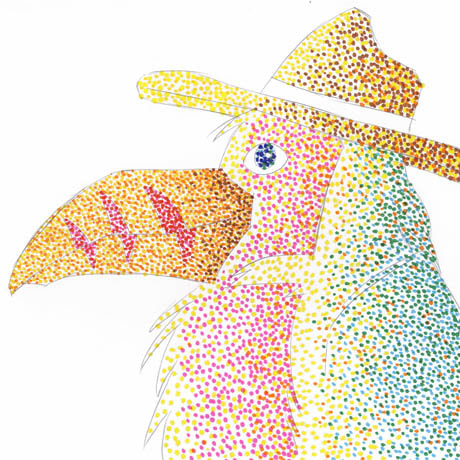
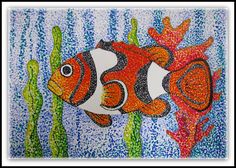
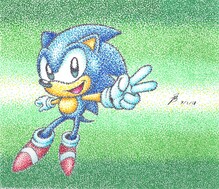
POINTILLISM ART
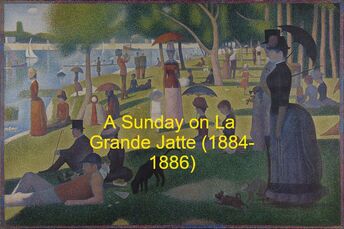
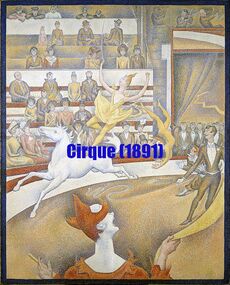
The term "Pointillism" in art refers to a technique of using tiny dots placed in close proximity to each other such that it is difficult to decipher if the dots are actually touching or not. The "father" of this movement in art was named George Seurat and he made his mark within the world or art in the late 1800's.
Some Facts About George Seurat
Here are two of Seraut's paintings:
Some Facts About George Seurat
- He was a French Neo-Impressionist painter in the late 18th Century. He was born in 1859 and died in 1891.
- He believed that the artist could create mood, harmony and emotion in art by using colors and lines.
- He painted using small distinct dots of colors directly on the canvas, without mixing the paint. This way when you stand a distance away, the dots seem to blend in into the desired color.
- His style of painting is called Pointillism. If you look closely at his paintings you will see that they are made out of many tiny dots.
Here are two of Seraut's paintings:
For more information about Seurat and the history and technique of panted Pointillism, the video to the right is perfect for budding artists.
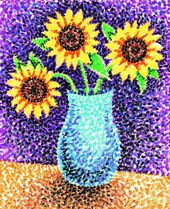
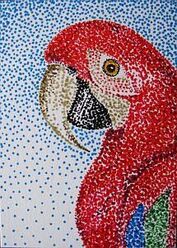
Interestingly, "dot matrix printers" use the same technique to create the images we see in magazines and newspapers. Instead of using paint, I prefer the students use pencil crayons and markers to complete this project. The video below provides a good explanation for this technique (see Marker Pointillism). As well, I have provided several examples of finished work below the video. |
|
|
|
|
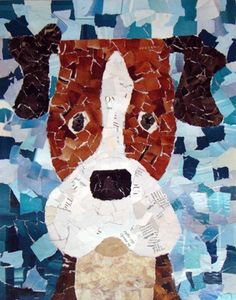
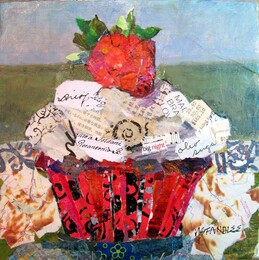
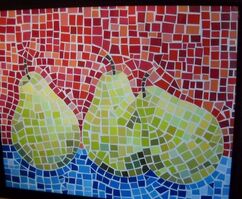
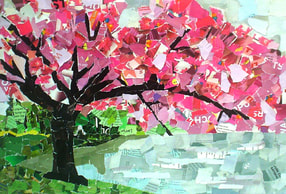
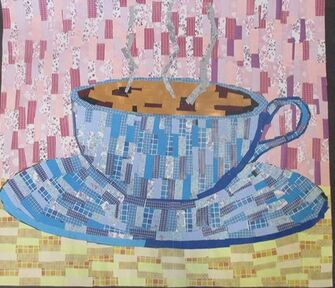
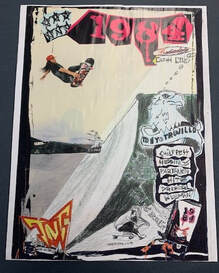
TEXTURE ART USING MAGAZINES
Summary
(Source: (http://www.kinderart.com/recycle/magmos.shtml)
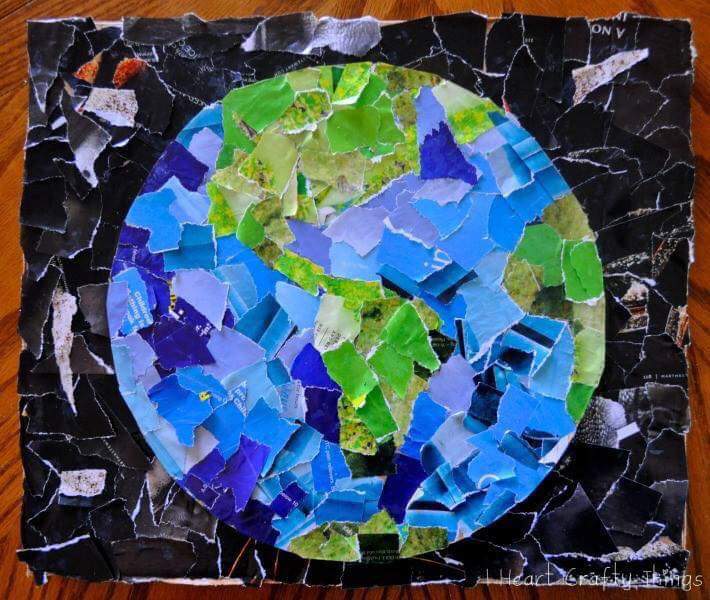
Students will use torn and cut up pieces of magazine pages to create colorful (in some cases, complex) paper mosaics.
What to Do
(Source: (http://www.kinderart.com/recycle/magmos.shtml)
Students will use torn and cut up pieces of magazine pages to create colorful (in some cases, complex) paper mosaics.
What to Do
- 1. Cut out small pieces of magazines or photos. Select related colours and start piles of reds, greens, blues etc.
- 2. Draw a picture or design onto the paper. Its a good idea to refer to pictures of mosaics.
- 3. Begin adding the pieces of magazines and photos to create a mosaic.
- 4. Remember to take time to plan out your ideas and don't be afraid to experiment.
|
Background
Mosaics are made of tiny colored pieces of stone, pottery, glass or other materials, arranged together and set in plaster or cement to make patterns and images. They can be used to decorate a floor, a wall or in some cases a ceiling. Mosaics have a long history. They were created in Ancient times in Babylon, Egypt, Greece and Rome. When the cities of Pompeii and Herculaneum (which were buried under lava when Mount Vesuvius erupted in A.D. 79) were rediscovered, many wonderful mosaics were found. Ask your students to imagine, making a mosaic using over one million pieces of glass - all hand cut, and placed into wet plaster to create a large pattern for their entry hall! It is a project that would take months and in some cases even many years to complete.For several centuries, interest in the making of mosaics declined. It wasn't until the 19th century, when architects started to look at old ideas for new inspirations, that the interest once again returned and mosaics began popping up in public buildings and private homes. |
For this assignment, I allow at least two weeks in class (often 3) as it is tedious work to collect all of the necessary colours and pieces of magazine print to complete the project. The students select their own image and then I project it up on the white board for them to trace onto a piece of black construction paper with a pencil. I have a box of old magazines for them to use, but they are also encouraged to use some from home.
|
|
|
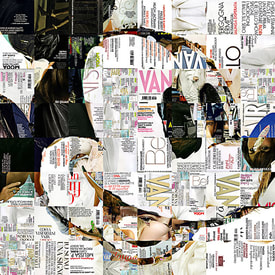
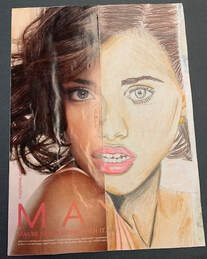
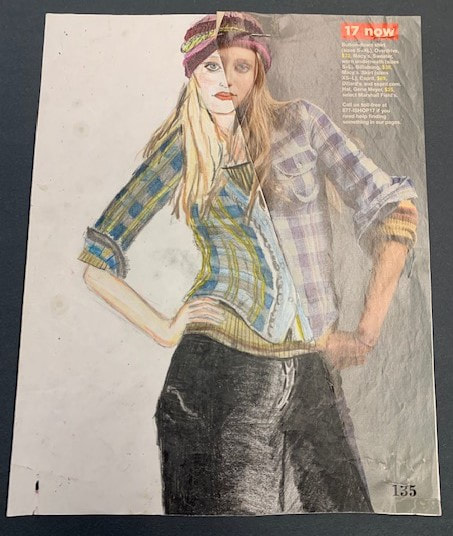
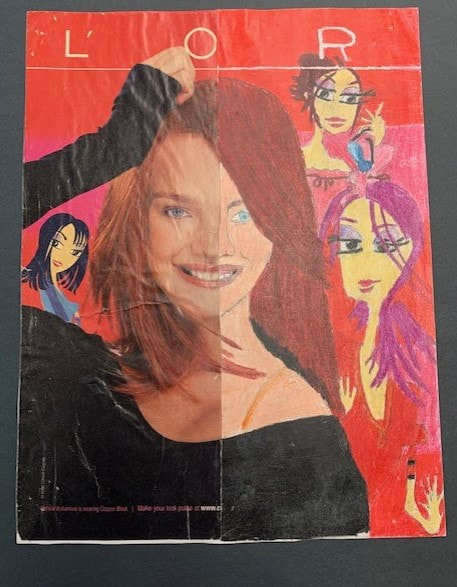
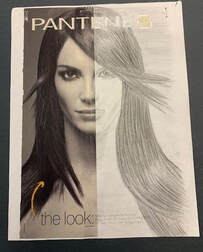
HALF AND HALF MAGAZINE ART
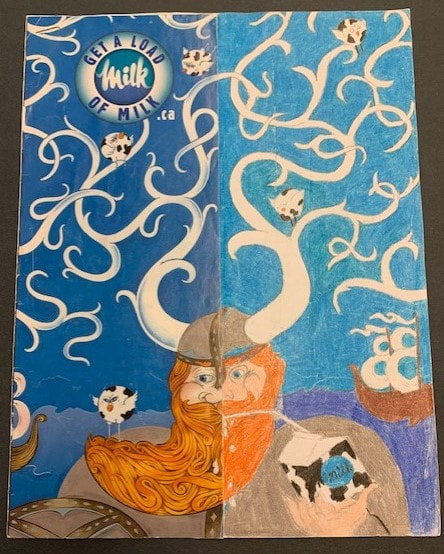
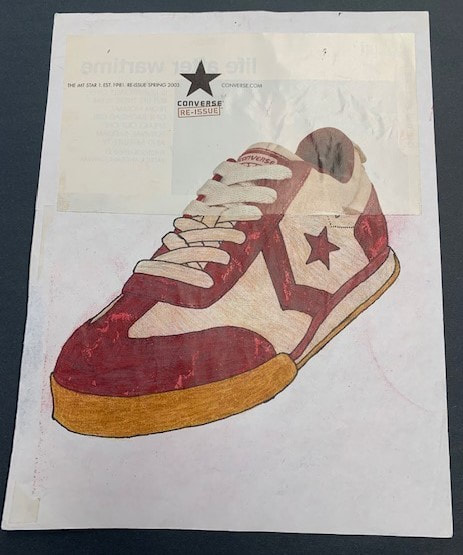
Students will find a full page magazine photo, cut it up, and draw in the missing pieces. The video explains how to do this, shows finished examples and tips, along with art teacher suggestions. It doesn't matter to me whether the image is completed in black or white or with colour.
Thanks to Jenn Anthony for this incredible video explanation of this fun assignment. Let's draw!w!
Below the video are some finished examples by students from my class in the past.
Thanks to Jenn Anthony for this incredible video explanation of this fun assignment. Let's draw!w!
Below the video are some finished examples by students from my class in the past.
|
|
|
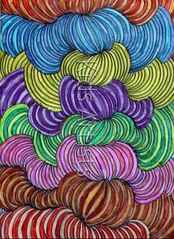
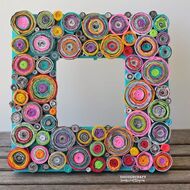
COILED ART USING MAGAZINE STRIPS
Another way to refurbish old stacks of magazines into colourful art is to use coiled magazine strips to create interesting art projects/gifts.
The following is a video tutorial of how to complete these projects:
The following is a video tutorial of how to complete these projects:
|
|
|


|

|
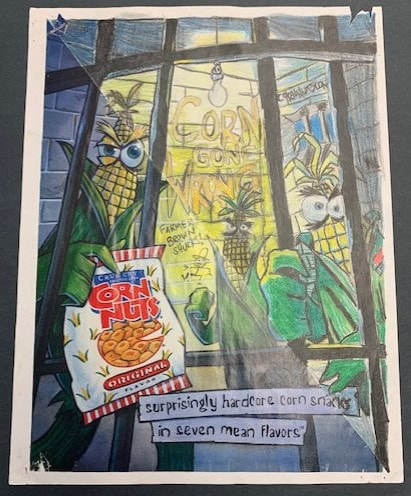
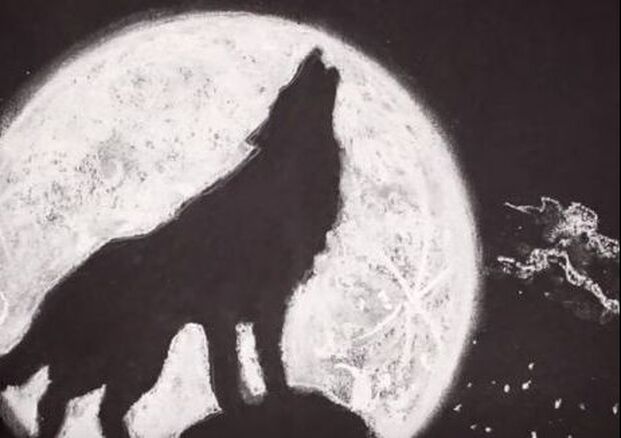
CUT SMUDGE ART CHALK PROJECT
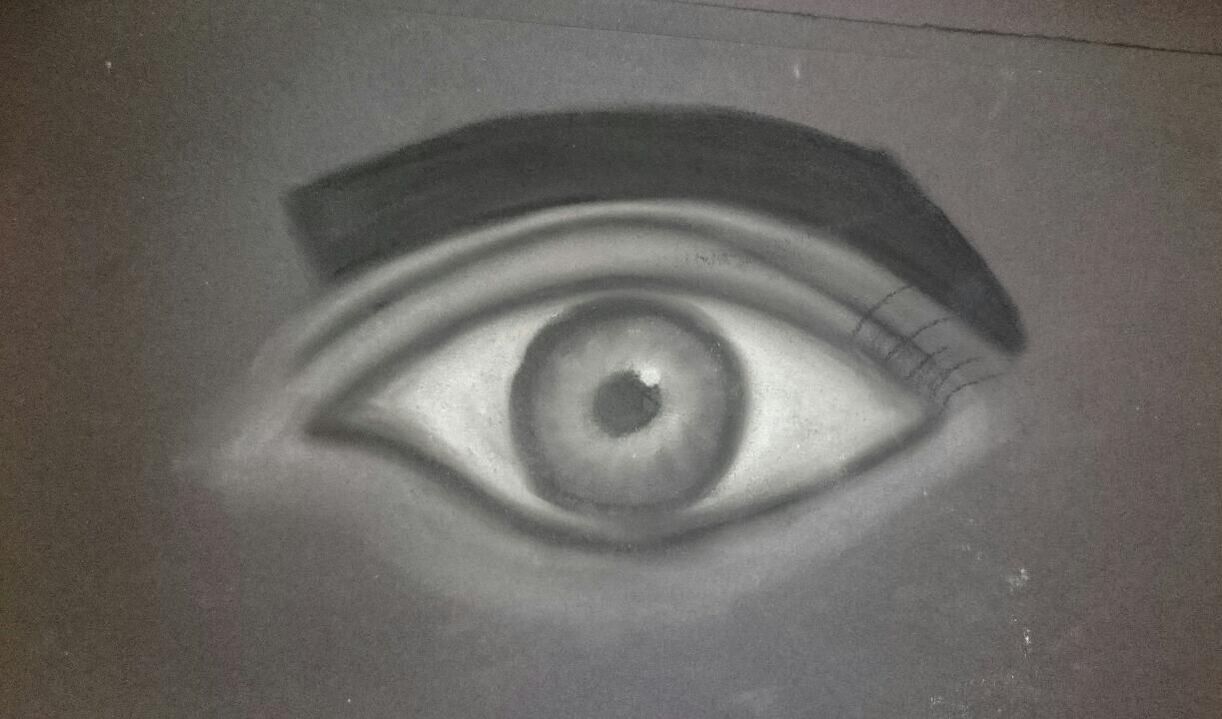
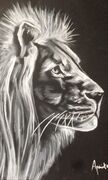
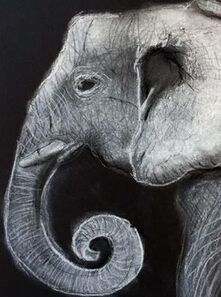
Smudging chalk is an easy to way to deliver an art lesson (although a little messy) for all experience levels that creates an attractive 3 dimensional finished product. Over three weeks, with some practice, a student can eventually produce a realistic image (landscape, animal etc.) using chalk instead of pencils.
All you need is a stack of 11 x 17 black construction paper (enough for the entire class over 3 weeks), white chalk, erasers with an edge (to help erase excess chalk and draw sharpened lines for contrast), scissors, and cotton balls (optional - to smudge with instead of or in conjunction with using finger tips).
Have fun cutting out creative patterns! You can also try experimenting with colored chalk (if you have some)!
- Below is a video tutorial describing the technique of how to complete the project (Smudge Chalk Art Lesson). I would do this lesson the first week.
- To the right of this video is a step-by-step instructional video of how to use chalk to draw a howling wolf. I would follow up the smudging activity with this lesson the second week with the entire class. This should help the students to gain some confidence with the technique of using the sharpened edge of a piece of chalk and an eraser to draw the silhouette of an image.
- I would then open it up the next art class the third week to allow the students the opportunity to come up with their own creative design (they may arrive with a printed image that they will attempt to recreate using the chalk). See some examples below.
|
|
|


|

|
